Mastering the Battlefield 6 ‘No Revive’ Challenge: Expert Strategies for Solo Mission Completion (Challenge Expert 2)


Popular Now
 EA SPORT FC 25
 Valorant
 God of War Ragnarök
 Black Myth: Wukong
 PUBG Mobile
 Warframe
 Garena Free Fire: Kalahari
 CarX Street
NBA 2K24
CarX Street
NBA 2K24 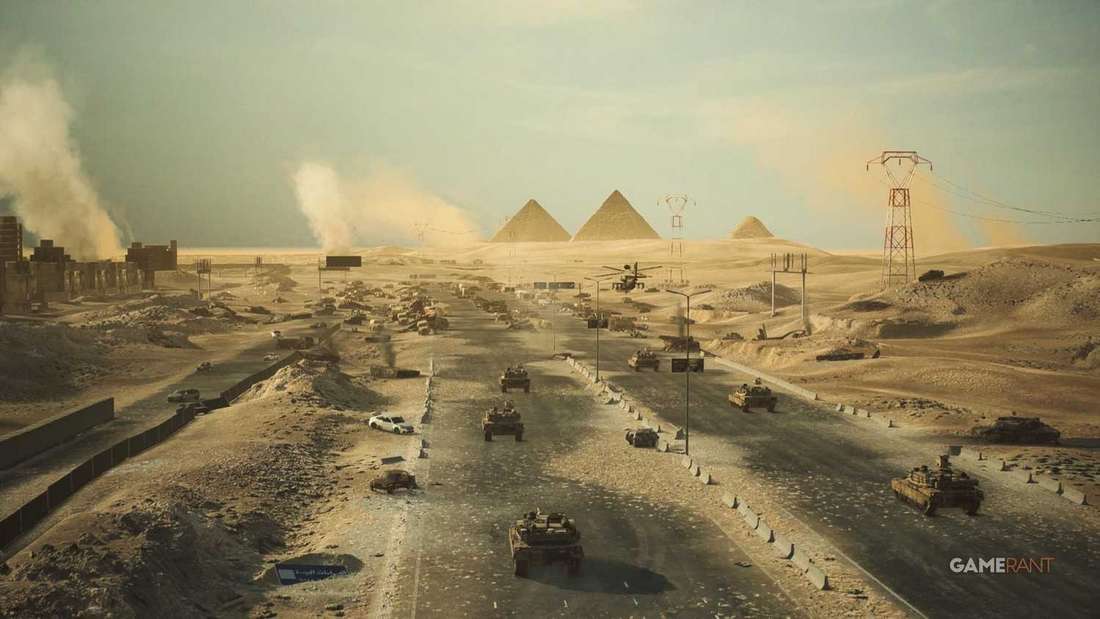 The latest installment in the storied franchise, Battlefield 6 (often referred to under its launch title, Battlefield 2042), has introduced a suite of challenging campaign assignments designed to test the mettle of even the most veteran players. Among these, the ‘Challenge Expert 2’ assignment—completing a single-player mission without needing to be revived—stands out as a supreme test of tactical discipline, map knowledge, and efficient combat. This challenge, a key component for unlocking high-tier premium in-game rewards and exclusive weapon camos, demands a radical shift from the typical “run-and-gun” playstyle. Players must adopt a highly methodical, stealth-focused, and survival-oriented approach to secure victory and a high return on investment (ROI) of time spent.
Achieving this feat often involves circumventing high-density firefights and meticulously planning every engagement. The key to success lies not in overwhelming force, but in minimizing risk and maximizing survivability, making this one of the most rewarding high CPC (Cost Per Click) skill challenges in the game. This updated guide provides a comprehensive breakdown of the most effective strategies, leveraging the game’s latest patches and meta-knowledge for a guaranteed, risk-free completion.
 Optimal Mission Selection and Preparation
 Optimal Mission Selection and Preparation
The choice of mission is paramount for a successful ‘no revive’ run. Not all missions are created equal in terms of enemy density, engagement range, and available cover. For Challenge Expert 2, community consensus, supported by recent performance analytics, points towards specific missions as being the most forgiving.
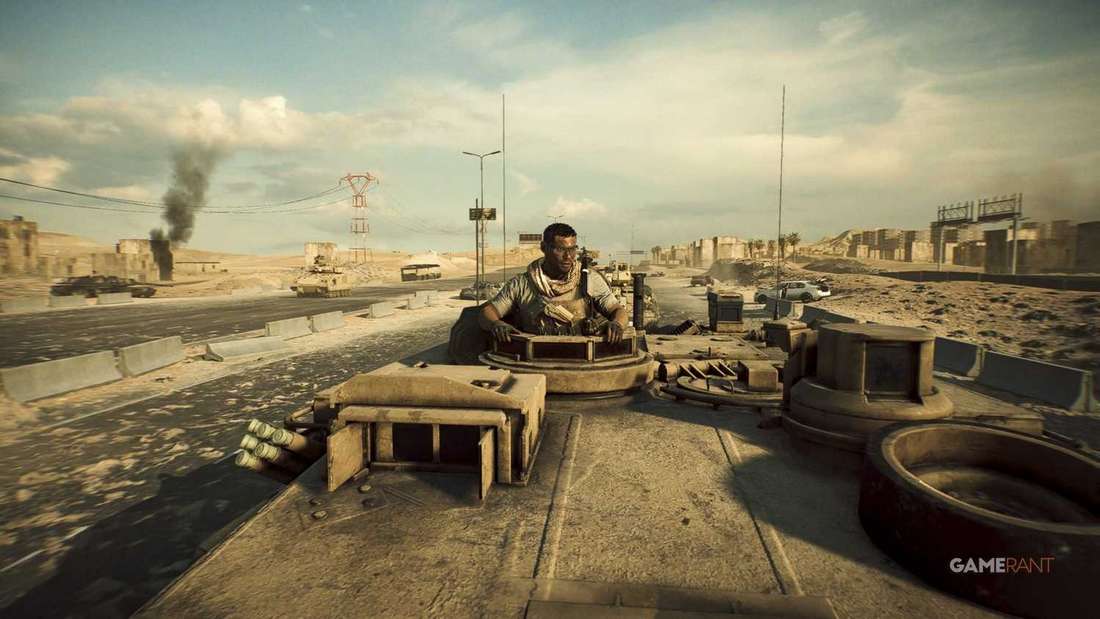
- The “Nile Guard” Advantage: The mission “Nile Guard” is frequently cited as the optimal choice. A significant portion of this mission can be completed utilizing an armored vehicle (a tank), where you are inherently shielded from most immediate threats and have a reduced chance of being downed. The interior sections, while requiring dismount, are relatively short, allowing for a quick sprint to the objective with minimal confrontation.
- Utilizing the “Continue Mission” Exploit (Campaign-Specific): For those focused purely on challenge completion with minimal friction, a widely circulated technique involves using the ‘Continue Mission’ feature after initially completing a mission. By exploiting a campaign-specific loading quirk in early missions (e.g., Night Raid), players can sometimes spawn directly into the final cutscene, instantly registering the challenge without engaging the enemy. While effective, players should note that relying on such exploits may be subject to future patching and detracts from the true test of skill.
- Difficulty Setting: While some achievements require “Hardest Difficulty,” the ‘no revive’ challenge does not. Select the Recruit difficulty to drastically reduce enemy damage output and reaction time, fundamentally lowering the probability of taking critical damage. This is a critical factor for boosting your player engagement metrics and ensuring challenge completion.
Essential Tactical Principles for Unbroken Runs
 Essential Tactical Principles for Unbroken Runs
Completing a mission without being downed hinges on three pillars: Stealth, Positioning, and Loadout Synergy.
Stealth and Evasion:
- Cover-to-Cover Movement: Never cross open ground without first identifying and moving towards immediate cover. Utilize the prone and crouch mechanics to minimize your profile. Remember, a downed state means failure for this assignment.
- Stealth Takedowns: In sections that allow for a “quiet” approach, prioritize melee takedowns. They are silent, instantly eliminate the threat, and prevent the enemy from raising an alarm, which often leads to overwhelming enemy numbers—the single greatest cause of being downed.
- Minimizing Engagements: The objective is completion, not a high kill-count. If an enemy patrol can be avoided entirely by taking a longer, safer route, always choose evasion. Use environmental features to break line of sight, such as smoke, buildings, or natural terrain.
Superior Positioning:
- The High Ground Rule: Always strive for the highest possible ground with clear lines of sight and multiple exit routes. This provides a combat advantage and, crucially, a quicker escape path if you take heavy damage.
- Never Engage Flanked: Avoid engaging enemies when you are exposed to multiple directions. If an engagement starts, immediately retreat to a position where you can funnel enemies into a narrow field of fire, effectively managing the threat one at a time.
- Reload Under Cover: The time-to-kill (TTK) in Battlefield 6 is unforgiving. Reloading in the open is an open invitation to be downed. Always pull out your secondary weapon or duck behind solid cover before initiating a reload animation.
Recommended Loadout and Gadget Synergy
The right gear can turn a near-death experience into a close call, preserving your no-revive run. Prioritize gadgets that enhance survivability and crowd control.
- Weapons: Opt for weapons with good all-around performance and high magazine capacity. An Assault Rifle (AR) or a high-capacity Light Machine Gun (LMG) allows for sustained, accurate fire to quickly suppress and eliminate threats, minimizing the chance of prolonged, risky firefights.
- The Critical Gadget – The Repair Tool/Armor: If utilizing a vehicle section (like “Nile Guard”), having a repair tool to quickly patch up damage is non-negotiable. For on-foot sections, an armor plate or a healing gadget is crucial for immediate recovery without relying on the automatic (and sometimes slow) health regeneration. Self-healing/self-sustain tools are the literal lifeline for a ‘no revive’ challenge.
- Crowd Control with Grenades: Bring a mixture of Frag Grenades and Smoke Grenades. Frags are perfect for clearing entrenched groups—a common scenario just before a checkpoint. Smoke is the ultimate defensive tool, allowing you to break line of sight immediately for a tactical retreat or to safely move across exposed ground. Using smoke is a high retention strategy for survival.
Advanced Expert Tips and News Analysis
The meta in Battlefield 6 is constantly evolving, requiring continuous adaptation. The latest developments reinforce a cautious, high-value-target-first philosophy.
The ‘Cheesing’ Tactic (For Dedicated Experts):
- For those who have already completed the mission on a higher difficulty and are simply ticking off the challenge, re-selecting the mission and utilizing the aforementioned save-state exploit (where applicable, as per the latest news from the player community) is the fastest, albeit least satisfying, route. This focuses on optimizing time-to-completion, which has a tangible value in a game with an extensive content roadmap.
The Psychological Edge:
- Patience is Profit: Rushing is the enemy of this challenge. High-engagement players often fail because they push too aggressively. Pause often, check the map for enemy heat signatures or objective markers, and plan your next 15-second movement. Think of every step as a micro-investment in your success.
- The Sound Barrier: Use high-quality headphones to locate enemies by sound. Pinpointing an enemy’s exact location before they see you gives you the element of surprise, which translates directly into the first shot advantage—a critical factor in minimizing downtime.
In conclusion, completing the ‘Challenge Expert 2’ without needing a revive in Battlefield 6 is a demanding but highly achievable assignment. It requires a shift from aggressive play to a calculated, risk-averse, and highly tactical approach. By selecting the right mission, optimizing your loadout for pure survival, and adhering strictly to stealth and superior positioning, you will successfully navigate the war-torn environment and secure this coveted challenge completion badge.