


 Garena Free Fire: Kalahari
  Warframe
  Sonic the Hedgehog™ Classic
  Counter-Strike 2
  EA SPORT FC 25
  Gacha Club
  Toca Boca World
  Free Fire Max
 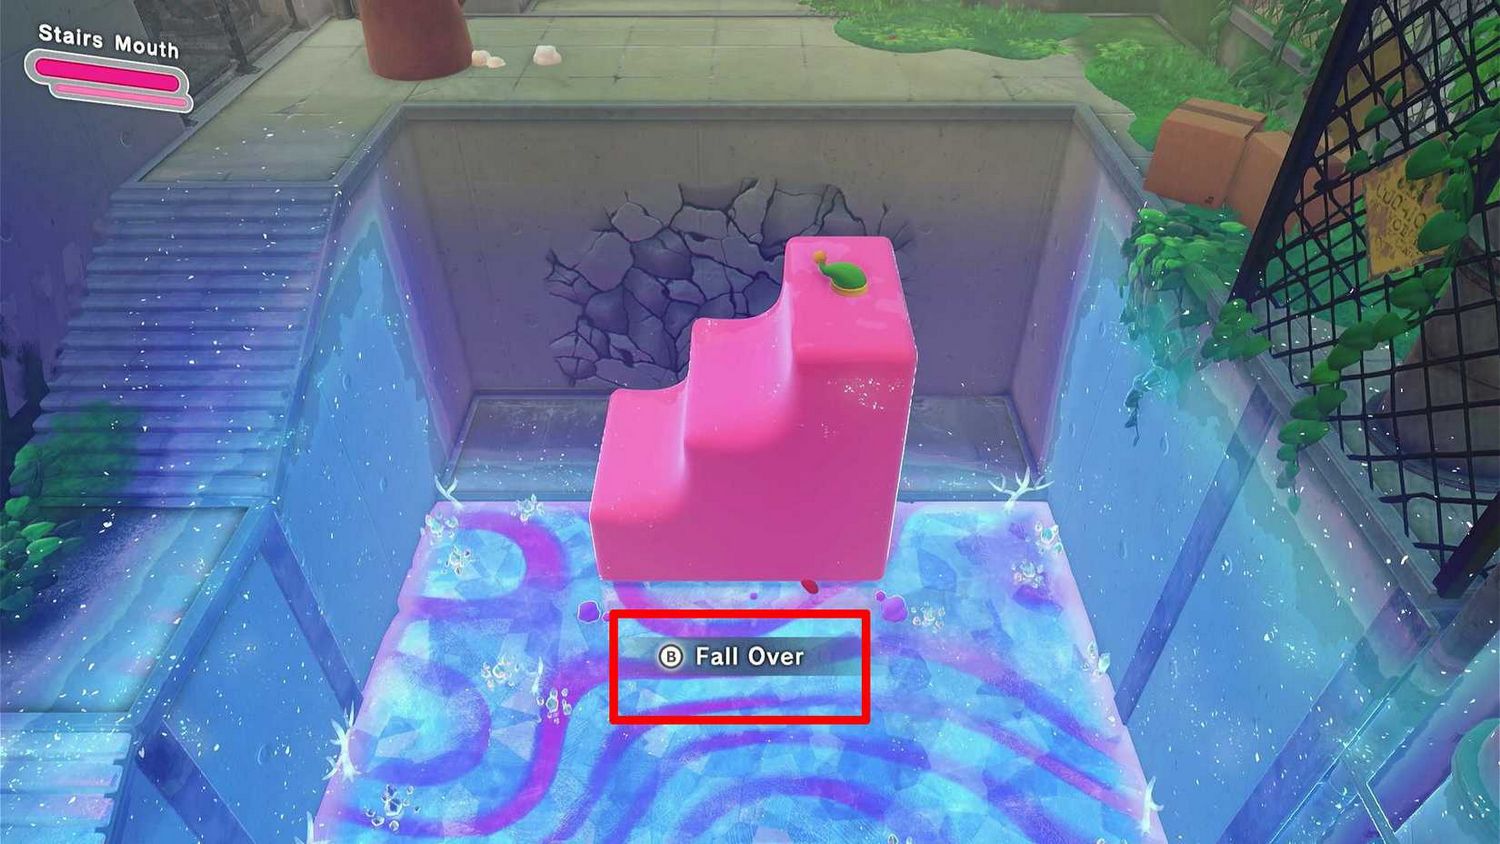 The fifth stage of the Natural Plains, Lost in Alivel Mall, offers a unique and engaging challenge in Kirby and the Forgotten Land. This sprawling, multi-path level requires a keen eye for detail and some clever use of Kirby’s abilities to achieve a 100% completion rate. Unlike previous stages, which primarily focused on platforming and combat, “Lost in Alivel Mall” introduces a puzzle-solving element with its misleading pathways and hidden secrets. This comprehensive guide will walk you through every mission, including the locations of all four hidden Waddle Dees, the four elusive doughnuts, the secret Invincible Candy, and the precise steps needed to “Navigate the mall without getting lost.”
To fully complete this stage, you must accomplish five specific missions. Three of these missions reward you with a Waddle Dee, while the fourth unlocks one by collecting all the doughnuts. By following this guide, you will be able to complete all objectives in a single run, ensuring you rescue every Waddle Dee and gather all collectibles to bolster Waddle Dee Town.
Mission Objectives for Lost in Alivel Mall
To achieve 100% completion in this stage, you need to fulfill the following missions:
- Clear the stage.
- Save the four hidden Waddle Dees.
- Eat four doughnuts.
- Eat an Invincible Candy.
- Navigate the mall without getting lost.
 Part 1: The Escalator and Initial Hallway
 Part 1: The Escalator and Initial Hallway
The stage begins with Kirby ascending a broken escalator. Immediately after, you will find a Needlous you can inhale to gain the Needle ability, which will be helpful later. Continue down the long hallway, defeating enemies and avoiding pitfalls.
Hidden Waddle Dee #1: As you progress, you’ll reach a section where a Poppy Bros. Jr. is raining down bombs from an elevated area. Before the star door, look to the left. You will see a bomb block. Hit it to reveal a ladder. Climb the ladder, go to the right, and you will find the first hidden Waddle Dee guarded by a Gordo. Be careful to grab the Waddle Dee without touching the Gordo.
Invincible Candy: After grabbing the first Waddle Dee, continue on the lower path toward the star door. In a small nook just before the door, you’ll find a colorful Invincible Candy. Eating it will fulfill one of your missions and allow you to quickly dispatch the surrounding enemies without taking damage. Don’t worry, the Invincible Candy mission is fulfilled regardless of where you find it.
Doughnut #1: After getting the Invincible Candy, you’ll find the first doughnut on a table in the area just before the star door. It’s sitting behind some boxes that you’ll need to break to reach it.
Part 2: The Burger Maze and Hidden Waddle Dee
This section is crucial for the “Navigate the mall without getting lost” mission. You will enter a food court area with multiple pathways, each marked by a different food sign.
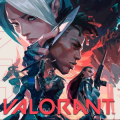
Navigate the mall without getting lost (Part 1): In the first section with multiple paths, look for a set of lockers. Use Mouthful Mode to tip them over and reveal a map. The map will show that the correct path is the one with the hamburger sign. Take the path marked by the hamburger.
Hidden Waddle Dee #2: By taking the correct path (the hamburger one), you will enter a room filled with tables and enemies. On a small stage at the far end of this room, you will find a treasure chest. Open it to rescue the second hidden Waddle Dee. Taking the wrong path will lead you to a different room, making it impossible to complete this mission in a single run.
Part 3: Wild Frosty and The Conveyor Belts
After navigating the first maze, you’ll face a mini-boss: Wild Frosty. Defeat him to gain the Ice ability. You will need this for the next step.
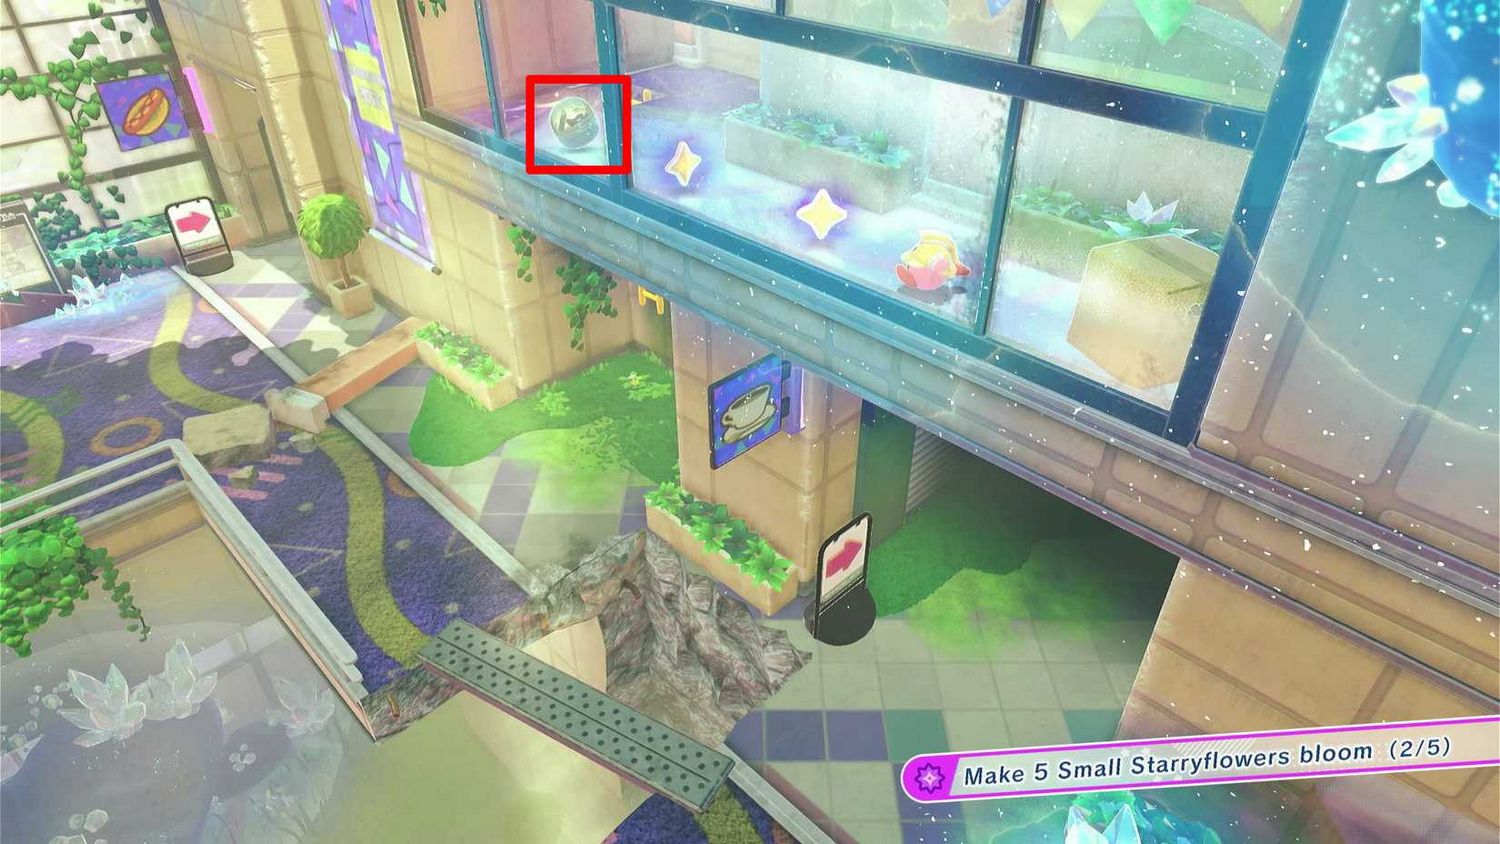
Hidden Waddle Dee #3: Once you’ve defeated Wild Frosty and are in the area with four conveyor belts circling a spike pit, look for a ladder on the upper-left side. This ladder is blocked by burning logs. Use Kirby’s Ice ability to cool down the logs, then climb the ladder. At the top, hit the switch to release the caged Waddle Dee onto the conveyor belts. Time your action carefully to grab the Waddle Dee before it falls into the spikes.
Doughnut #2: In the same conveyor belt area, look for a sparkling spot on the ground at the lower-right corner. Walk over it to make the second doughnut appear on a nearby conveyor belt. Grab it quickly before it goes off-screen.
Part 4: The Final Maze and Last Collectibles
 Part 4: The Final Maze and Last Collectibles
The last major section is another maze-like food court. The correct path is essential for saving the final hidden Waddle Dee and completing the “without getting lost” mission.
Navigate the mall without getting lost (Part 2): In this second food court, you will again see multiple pathways. Look for the lockers and use Mouthful Mode. They will show a hint about the “cake” sign. The correct path is the one with the cake sign that has an ice cream sign directly across from it. It’s the leftmost path in this section.
Doughnut #3: Take the correct path (the cake sign) and enter a room with three treasure chests on a stage. Before opening the chests, look for a shining spot on a table to the left. Touch it to make the third doughnut appear on another table nearby.
Hidden Waddle Dee #4: In the same room where you found the third doughnut, the treasure chest in the middle of the three on the stage contains the final hidden Waddle Dee. Open it to rescue him.
Part 5: The Grand Finale
You are now in the final area of the stage, with a golden cage full of Waddle Dees and the exit star. However, one last doughnut remains.
Doughnut #4: Before you clear the stage, climb the yellow ladder to the right of the golden Waddle Dee cage. You’ll find the last doughnut on a table at the top. Grab it to complete the doughnut mission.
After collecting all four doughnuts, rescuing the four hidden Waddle Dees, eating the Invincible Candy, and navigating both mall sections correctly, you will have completed all of the stage’s missions. Now you can safely rescue the remaining Waddle Dees in the golden cage and clear the stage, earning a perfect 100% completion score for “Lost in Alivel Mall.”